(This article is a continuation of “Preparing for an installation Part 1 and Part 2. It is recommended that you read Part 1 and Part 2 before continuing to part 3.)

Laying the stones
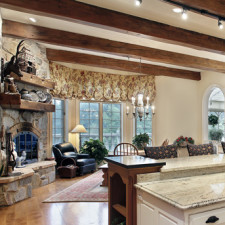
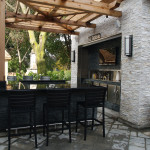
All stone veneer projects require careful planning and attention to detail. As described in parts 1 and 2 it is important to have a sketch of the project to act as a guide for the installation process. The sketch will be an essential reference point for the installation so be sure to continually refer to it when in doubt.

Arranging stone patterns
Most stone veneer will require a level but if you’re aiming to create a more natural look then a more complex arrangement process must be established. Larger stone veneers like Fieldstone, Tuscan Fieldstone, and Cobble Stone will require more thorough planning. Since they are large, irregular in shape and heavier than most other stone veneers they require special attention in the installation process.
First off remember to be very delicate when placing these stones on the ground. Since they are wide and displace a large area the stone veneer can crack or split if mishandled.

Cutting stone veneer
Also, it is important to lay out a design on the ground before attaching the stones to the walls. Natural patterns are more difficult to produce then one might think. A good natural pattern is not one chosen at random. Instead a pattern that recognizes harmony and allows the stones to balance each other out produces the greatest results. This can be achieved by combining the smaller stones with the larger ones and mixing the hue’s of each piece evenly. Lay out a few square feet of the stone veneer on the ground and mix them around until you are satisfied with the pattern. Then mount the stone veneer onto the wall in the same pattern as you had laid out.

Leveling stone veneers
Remember not to rush this process, the design and layout is one of the most important points in the installation. Here is where you will be building up the look of the stone veneer. It will pay off in the end of you take your time and choose an arrangement that you are satisfied with. Attaching the stone veneer to the wall is the final step and should be carried out as such. Here at Stone Selex we have a saying: layout twice, mortar once!

Grouting stone veneers
For more information on installation visit our Stone Selex website or visit our showroom located in Mississauga. Feel free to ask one of our experienced sales representatives about the full diorama we’ve built to illustrate the installation process.

Finishing the grout line
Tags: DIY Stone Veneer Installation, faux stone veneer, installing stone veneer, interior stone veneer, Lightweight Stone Veneer, manufactured stone fireplace, Manufactured Stone Veneer, natural stone veneers, stone veneer, stone veneer design, stone veneer how to guide, stone veneer installation, stone veneer layout, Stone Veneer Mississauga, Stone Veneer Oakville, stone veneer Toronto
 Share On Facebook
 Tweet It